Growing Guide
Salvia


Growing salvia from seed:
Growing salvia from seed is a rewarding experience that allows you to cultivate a stunning array of colorful, aromatic, and pollinator-friendly plants right from the start.
Salvia, known for its vibrant blooms and adaptability, is a favorite among gardeners for its ability to brighten up garden beds and attract beneficial insects like bees, butterflies, and hummingbirds.
Starting from seed not only saves money but also gives you the satisfaction of nurturing plants from their earliest stages.
Whether you're looking to create a lively landscape, support local wildlife, or enjoy the therapeutic benefits of gardening, salvia is an excellent choice. I
ts resilience, beauty, and versatility make it a must-have addition to any garden, and growing it from seed ensures you get to enjoy every step of the journey.
Quick Guide
Start Indoors (recommended):
Timing: 6-8 weeks before last spring frost
Seed Depth: 1/4"
Germination time: 5-12 days
Transplant out: After last frost date
Direct Sow:
Timing: after last spring frost when soil temperatures have warmed up to at least 65°F (18°C)
Seed Depth: 1/4"
Germination time: 7-14 days
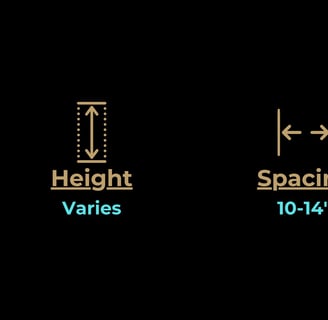
Plant Specifications


Step-by-Step Instructions - Starting Seeds Indoors
Collect Supplies:
Seeds
Seed starting trays or pots
Seed starting mix (sterile)
Labels and a marker
Plastic wrap or a humidity dome
Spray bottle or watering can with a fine nozzle
Grow lights or a sunny windowsill
Timing
When to Start: Begin the process about 6 to 8 weeks before the last expected frost date in your area.
Preparation
Clean Containers: Sterilize your seed starting trays or pots to prevent disease.
Moisten Seed Mix: Slightly moisten your seed starting mix so it's damp but not soggy.
Planting Seeds
Fill Trays: Fill each cell in the seed tray with the moist seed starting mix.
Sow Seeds: Place 1-2 seeds in each cell.
Label Trays: Label each tray or pot with the variety and the planting date.
Germination
Cover Seeds: Press the seed gently into the soil to a depth of 1/4" and cover with soil.
Moisten Surface: Use a spray bottle to mist the top of the soil.
Create Humidity: Cover the seed trays with plastic wrap or a humidity dome to maintain moisture.
Warmth: Place the trays in a warm location (70-75°F or 21-24°C). A heat mat can help.
Light and Watering
Lighting: Once the seeds germinate (about 5-12 days), remove the cover and place the seedlings under grow lights or in a sunny windowsill. Provide 12-16 hours of light per day.
Watering: Keep the soil moist but not waterlogged. Water from the bottom if possible to prevent damping-off disease.
Take Care of Seedlings
Thinning: Once seedlings have two sets of true leaves, thin them to one plant per cell or pot.
Hardening Off: About a week before transplanting outdoors, start to harden off your seedlings by gradually exposing them to outdoor conditions for increasing time periods each day.
Transplanting Outdoors
Timing: Transplant the seedlings outdoors after all danger of frost has passed.
Soil Preparation: Choose a sunny spot with well-draining soil. Amend with compost if needed.
Planting: Plant seedlings 10-14 inches apart, depending on the variety.
Watering: Water thoroughly after planting.
